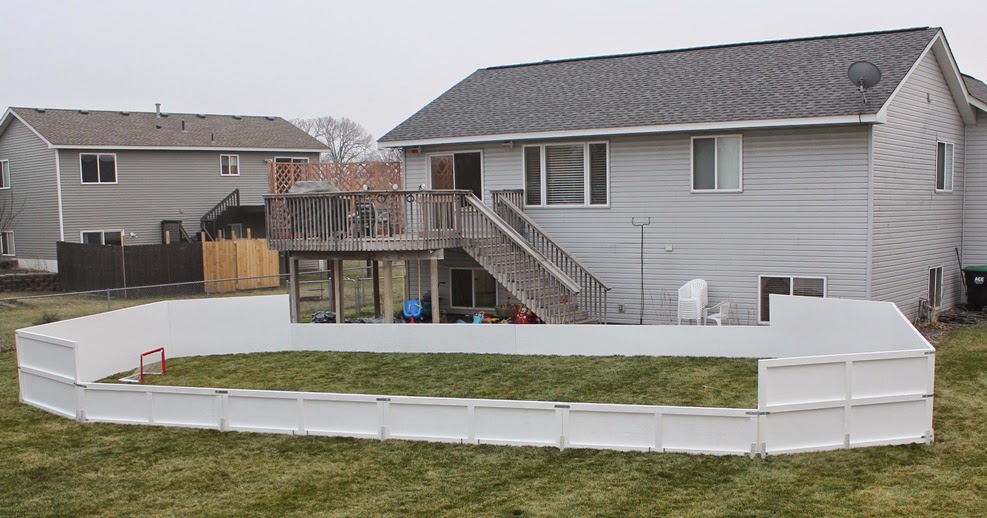
Ideas for building a rink on a tennis court or any hard court

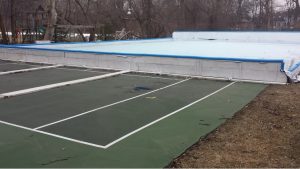
Hard sports courts or tennis courts present many different challenges when building an ice rink.  The repeated concern is that customers do not want to drill into their hard court…quite understandable! Since every hard court scenario is different, Iron Sleek will try to present you with some ideas to build a rink on a hard court or on a tennis court.  A few good pictures can tell the story best.
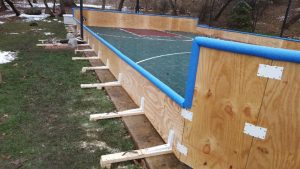
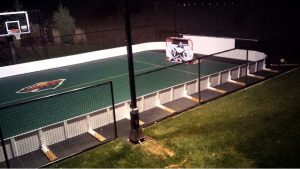
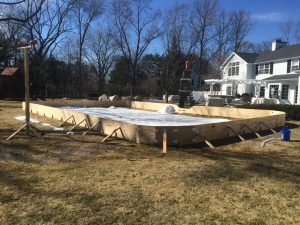
Below is an ideal scenario.  Grass on all 4 sides.  It is ideal because you can use Iron Sleek brackets right into the lawn to secure the rink. 
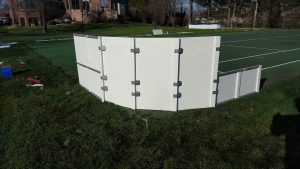
Boards on the lawn with court on the inside.
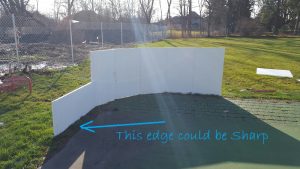
Be sure to protect the liner from a possible sharp edge where the court meets the lawn.  8″ LPS does a great job to handle that.
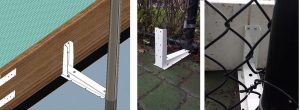
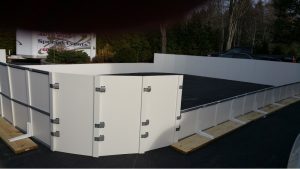
Do not want to use the full Tennis court?  Use the sleeper method.  Lay a 2 by 12′ or plywood down on to the court with the Iron Sleek Hard court bracket.  Reach back with sleepers to spike down or secure against fence.
Secure it outside the Sports Pad!
Use the hard court bracket and secure against fence.
Completely on a hard court.  If you do it this way, be sure to find a way to either sleeper back to something secure or to weigh down the rink.  This rink still need supports for the tall backboards.  A hard court bracket alone is not enough to sustain the leverage of a 42″ board.  You would still need Iron Sleek Outriggers.
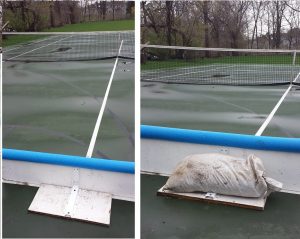
If all else fails, you can use sand bags.  Sand bags are the least preferred method on a hard court rink.  A freeze thaw scenario will cause the boards to drift and this can likely cause the liner to over stretch.  An overstretched liner will eventually fail.  Also, sand bags are much too heavy to handle.  I recommend saving your energy for fun versus tossing heavy sand bags around.  I would avoid sand bags if at all possible.
Hopefully some of these strategies can apply to your hard court rink.  One other thing to keep in mind is that if you are building this rink every year, it may not be such a bad idea to have some reusable pilot holes to secure the rink.  We have many customer who take that approach.  Please feel free to give us a call to discuss your project.  We are happy to help out.

How to cut an Iron Sleek Poly Steel Board


An awesome feature of the Iron Sleek Poly Steel board systemis that boards can be cut in the field by our customers to custom fit their project requirements.  This is a very unique capability that is easily accomplished with our board system.  It is very useful for rinks that have borders or for optimizing size in a backyard.  Below is a description on how to cut an Iron Sleek poly steel rink board to your desired length. 
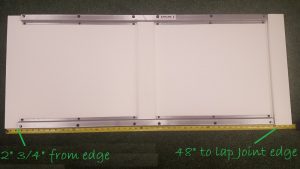
Iron Sleek Poly Steel Boards are standard 48” long from the lap joint edge to the board edge.  It is very important to understand that the lap joint is not part of the length of the boards.  The lap joint section of the board should not be cut.


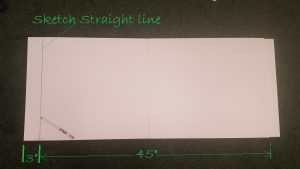
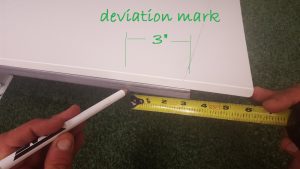
Step 1:  Determine the target length of your board and make note of the deviation from the standard length of 48”.  For example if the boards target length is 45”.  The deviation is 48” minus 45” which equals a 3” deviation.
Step 2: Mark the deviation on the poly boards and the Poly Steel Channels before disassembling both opposite of lap joint.


Step 3: Sketch a straight cut line on poly panel.


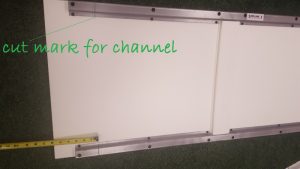
Step 4: Mark the deviation on steel channel.
Be sure to mark both steel channels

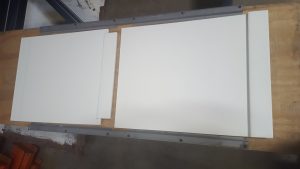
Step 5: With the board panels already marked and the steel channels already marked.  Disassemble the channels from the boards.

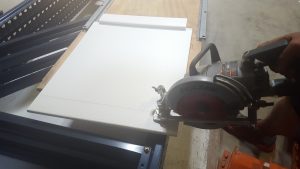
Step 6: Cut the marked panel with a circular saw using a wood cutting blade.  For best results you can use a table saw.

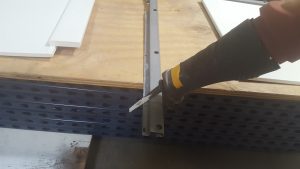
 Step 7: Cut the 2 marked rails with a reciprocating saw, chop saw, or hand hack saw.

Step 8: After all the pieces are cut, you can chamfer or route cut edge of poly panel and file off sharp corners on the cut edge on steel channel.

Step 9:Now simply reassemble board components.  Be sure to not spin out black mounting screws when reassembling.  Your board should be your desired length.  For this example it will be 45″

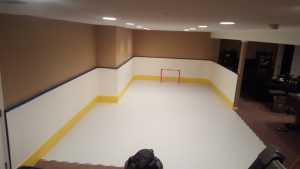
Check out this basement shooting lane.  With the this ability to cut we were able to wrap around our customers basement to optimize the provided space.  


Backyard Rink, Time to tear it down for Spring!


Everyone’s rink setting, configuration and climate is unique.  Please consider the points below as general guidelines for tearing down your rink. 


1)      The Meltdown.


I usually leave my rink alone and let nature take its course; however, if you want to speed things up, here are a few things to keep in mind. 


a)       DO NOT DRAIN YOUR WATER. 
There are 2 reasons to hold off on draining your water.   First, exposed water on a rink picks up kinetic energy from the wind to instigate the melt down.  This makes a huge difference.  Moving water melts ice so puddles on top of your ice will help to melt it, even at night.  Keep the water in the rink.  Second, the water temperature will rise faster than the ice temperature.  Ice gets stuck at 32°F until it gains enough heat to convert to water.


b)      DARK COLORS. 
This is the only time your white Iron Sleek liner is going to work against you.  Since you have already had a season as manager of your rink, you know quite well that a leaf burns its way to the bottom of a rink.  Consider placing a dark colored tarp on ice sections to gain solar energy.


2)      Water Removal.


The key here is to get the water away from the rink and not to flood you or your neighbor’s home.  Water under the liner for an extended period of time can trick the grass into becoming active.  A liner covering active grass can suffocate the lawn.  Here are a few pointers to not kill your grass and to not flood anyone’s home. 


a)       PUMP IT OUT.
The best way to remove water is with an electric or gas pump that has a discharge hose.  Your local home improvement store usually rents them out.   As a reference point, a 30 GPM pump will empty a 20×46 rink in 2-3 hours.  With a pump arrangement, you have full freedom to direct the water to areas that are suited for drainage…like the city sewer.  If you cannot reach the city sewer, you will need to direct the water toward a safe and convenient draining area.


b)      SIPHONING. 
Siphoning is slow but it works well.  With siphoning, you will have some flexibility on directing the drainage.  My warnings are that it will take several hoses to get a decent flow and that starting the suction takes some strong lungs.  A benefit of siphoning is that the low flow rate gives the ground a better chance to absorb the water. 


c)       OPEN THE RINK. 
At the high water corner you can open your rink to let all of the water flow out.  This is the fastest way to drain your rink.  I have done it this way for years, but I did notice that is has some negative effects.  Over flooding the grass can damage the grass roots.  Also, repeated flooding can lower your ground’s grade.


d)              OTHER POINTS.


          Do not open the rink on the low water corner.  Water will eventually flow under the liner.


          Do not puncture holes in your liner.  We have seen customers do this just to find out that they flood their grass root and had some dead spots on their grass. 


3)      Remove Ice Chunks.


Even after having pumped out your water, you may still have some ice chunks on your liner.  We recommend removing one section of boards to slide the remaining ice out.  See below on how to remove boards and brackets.  Do not attempt chipping out a full sheet of ice.  That is a job for a Bobcat.  To put this in perspective, a 20×46 rink could have 35,000 lbs. of ice in it!  


4)      Liner Removal and Disposal.


Getting the liner up is critical because you do not want to suffocate active grass!


a)       CUT A LUMBER COVER. 
If you need a piece of liner to cover your lumber, now is the time to cut that piece out.   


Cut the liner into manageable strips.  If you do not approach this properly, it can cause a lot of unnecessary headaches.  Keep it manageable for you and for your recycling service team.   You will not regret this step.  If the liner is too difficult to dispose of, recycling will leave it behind and it will be your problem. Roll up the strips and bring to your blue recycling bin.  Iron Sleek liners are 100% recyclable. 


5)      Remove your Containment Boards.


a)       Unscrew the Iron Sleek brackets from the boards.  Leave the brackets in place and unscrew the boards from the Iron Sleek brackets. DO NOT PULL UP THE BOARDS WITH YOUR BRACKET ATTACHED.


6)      Remove your Iron Sleek Brackets.


Note: Do not use any leverage tools for this (no sledge hammers, no crowbars)


a)       To remove an Iron Sleek bracket, tip the bracket forward and backward a just a bit to loosen the dirt.  (NOT SIDE TO SIDE)


b)      After the dirt is loosened, pull the bracket STRAIGHT UP out of the ground.


c)       Remove dirt from the bracket and fill divots in the grass. 


7)      Storage.


a)       The best place to store your boards is in a temperature and humidity controlled environment.   A garage, basement, or shed typically work well.  If you must store your boards outside, make sure you put them in a place that is relatively flat and dry.  I store my boards outside under a liner, near my rink site to reduce lifting.  I occasionally have a board rot out, but it is rare.


b)      You can gather your brackets and put them on a shelf in your shed or cover them outside.  They are steel so their properties will not degrade but to prevent rusting, covering them is a good idea.  If you have rink topper, keep it out of the sun. 


Improvements for next winter start now. 
Click here to read blog on rink improvements for spring.

Create The Perfect Backyard Rink With Iron Sleek Ice Rink Liners

Creating the perfect backyard rink hinges on a host of key factors. Picking the best spot on your property, using a top quality kit, and accessorizing as needed are just some of the important factors to consider when you begin your build. Another critical detail to keep in mind when you move forward with your arena is choosing the right ice rink liners.

Iron Sleek Offers Top Quality Ice Rink Liners For Your Build

If you are searching for top quality ice rink liners to finish your backyard arena, look no further than Iron Sleek. Here at Iron Sleek, we pride ourselves on providing our customers with premium ice rink liners for a perfect final fit and finish. When using our ice rink liners, you will enjoy a wide range of distinctive features that will enhance the overall performance of your arena.

Experience The Iron Sleek Difference For Yourself

What are some of the key distinctions that an Iron Sleek rink offers? The first thing you will notice is the top quality material that we use on all of our ice rink liners. Every product uses only virgin polyethylene plastic resins. No inferior fabrics and provisions; no recycled materials and no add on consumer products; only premium components to ensure you receive a highly durable, 100% watertight final product.

Beyond quality materials, we also only offer white liner products. Many of our customers initially assume that the color of the product does not make a difference. However, our team educates our customers to help them understand the benefits offered by white materials. Dark liner colors and even clear liners can absorb extra heat and potentially melt your rink on warm, sunny days. A white liner will reflect solar energy and protect the performance of your arena.

Another major differentiating feature when purchasing one of our ice rink liners is the extensive sizing selection. With our sizing selection you be sure to have enough liner to cover your entire rink while still not over buying. This help to keep things economical. Our liner sizes are smart so that waste is minimal. Iron Sleek liner widths and cuts work awesome with nominal lumber, plywood, and our poly-steel boards.

Most importantly, when teaming with Iron Sleek, we offer extensive instructional resources to our clients. We firmly believe that building the perfect backyard arena should be fun and easy, not daunting and stressful! That’s why we offer instructions and video clips that can take you step-by-step through every phase of the process for the ultimate ease-of-use experience from start to finish.

Contact Iron Sleek Today For More Information

Want to hear more about how Iron Sleek can help you create a backyard arena that your neighbors will envy? Contact our team today at 877.825.2334 and connect with a specialist now!

Backyard Ice Rink Kits: Six Tips To Buying The Right One For Your Family

Looking for fun and creative ways to use your yard during the cold winter months? Backyard ice rink kits can deliver an ideal option. Well-built backyard ice rink kits can easily transform your snow-covered yard into a fun ice-skating arena that everyone in the family will enjoy.

When you’re ready to move forward with purchasing backyard ice rink kits, it’s important to know what to look for to ensure you receive a premium product that will suit all of your needs. There are many providers to choose from; knowing six important tips will help you weed out non-viable vendors and find the perfect option for your family.

Tip #0: Team up with a product supplier who are backyard experts

Many tarp or liner suppliers actually know nothing about rinks. It is just a seasonal hobby for them. They will buy the cheapest supplies trying to make a quick buck in the winter. Choose a company whose passion and knowledge is outdoor rinks. The company you choose should become your consultant. Building a rink could be tricky, be sure the company you buy from is your rink building teammate.

Tip #1: You Should Have Options

Are you looking at various vendors who offer backyard ice rink kits, but feel like your choices are very limited? Or, do you feel like you’re being forced into decisions that aren’t quite a perfect fit for your family? Move on; a quality provider of premium backyard ice rink kits will offer a comprehensive range of product options and sizes. Having options available means that you can select the right model to fit both your backyard, your skaters’ needs and your budget.

Tip #2: Look For Money And Time Savers

Outdoor ice-skating rinks should not drain both your time and financial resources. Established vendors will offer various kits and products at affordable pricing. Best of all, an experienced vendor will create kits designed specifically to save you time.

Tip #3: Get Everything You Need In One Package

Some providers offer a la carte shopping for each individual item needed for installation. The result? You spend more than you need to setting up and you waste precious time purchasing every single component you need separately. When shopping, choose vendors that offer all-inclusive backyard ice rink kits so you know you will have everything you need in one package.

Tip #4: Consider Materials Used

Your outdoor rink needs to be strong and durable to ensure it withstands everything you and your little skaters dish out over the year. Don’t settle for a design made of subpar materials or a homemade recipe. Find options that offer a steel design. Steel backyard ice rink kits deliver superior performance and endurance, making them an ideal choice for homeowners.

Tip #5: Have Room To Grow

Sure, a smaller ice rink may suit your family’s needs now. But, what happens when everyone starts to grow? Will your ice rink be able to grow right along with you? If not you may find yourself starting over and having to purchase an entirely new set at some point. Don’t waste money starting over. Look for a kit that is expandable, so your rink can grow along with your family.

Tip #6: Look For Customization Accessories

Once again, settling for one-size-fits-all kits is not the answer. Instead, search for vendors that offer accessories that complement their designs. You and your family can select various items to customize your rink as only you can.

Have questions about quality backyard ice rink kits? We have answers. Contact Iron Sleek today to hear more!

Get Outside and Active This Winter with Backyard Rinks

It’s no secret that staying active throughout the winter months can be a challenge for any family. It seems like the colder it gets, the easier it is for us to stay inside until we eventually go into a quasi-hibernation mode, complete with comfort food and lots of television. If you’re tired of hunkering down at home during the winter months, you just may be an ideal candidate to install backyard rinks on your property.

Backyard Rinks: Versatile, Convenient And FUN

Homeowners who install backyard rinks instantly notice an impressive range of benefits. The first thing that many notice after installation is just how much everyone in the family wants to use it! Kids and adults alike love the opportunity to simply lace up their skates and hit the ice. Not only will you get extensive use out of it, but it also provides the perfect excuse to get outside and enjoy some fresh, albeit chilly, air.

Beyond extensive use, backyard rinks also provide an excellent opportunity for you and the whole family to get outside and stay active. In many families, when the temperatures go down, the dependence on electronic devices goes way up. Many parents struggle to find ways to get their little ones moving and staying healthy. A backyard arena allows them to build up some cardiovascular endurance and stay fit no matter how much snow comes.

What is another reason why you will love your personal skating arena? It’s a great way to spend time together as a family. Sometimes winter fun together can be challenging. With so many different ages to accommodate, finding an activity that everyone can do and actually enjoy can be tough. Backyard rinks are a great way for skaters of all ages and with every ability level to spend time together, right in your own yard.

Speaking of right in your own yard, skating arenas are extremely convenient. Yes, having a public rink in the vicinity does offer some skating opportunities. However, you have to work around their timetable. Open ice time can feel few and far between when you and your family are trying to make it work with your busy schedules. A personal arena means you can conveniently skate whenever you want.

Sharpen Your Skill Set Or Just Play On Your Backyard Rink

Best of all, backyard rinks offer homeowners the opportunity to use them as formally or as casually as they would like. Have competitive skaters and/or hockey players in your home? They will love working in their own yards to sharpen their existing skills and raise their talent levels at their own pace.

Prefer to keep things casual during rink time? Not a problem; many homeowners simply use their arenas to let their children enjoy unstructured playtime. Sometimes that may mean organized pickup hockey games with the neighbors. Other times it may mean letting the kids outside to make up their own games and competitions.

Want to hear more about our premium quality outdoor ice rink products? Contact Iron Sleek today!

Top Ways Iron Sleek’s Ice Rink Liners Stand Apart From Other Products


Buying a backyard ice rink is an exciting time for any homeowner; it’s the perfect way to pass time throughout the winter months with the kids and stay active as the temperature drops. However, with the excitement of a new rink comes yet another decision to make when trying to find the right ice rink liners to use on your system. There are many options, both in retail stores and online. How can you be sure that you are picking a winner?

Here at Iron Sleek, we understand how critical quality ice rink liners can be for any outdoor system because we help 1000’s of people build rinks across the US and Canada. It’s our mission to make ice rink liners that truly stand apart from other products in the marketplace. How do we achieve this key goal? By delivering a line of liners that touts several distinctive qualities.
What To Know About Our Ice Rink Liners
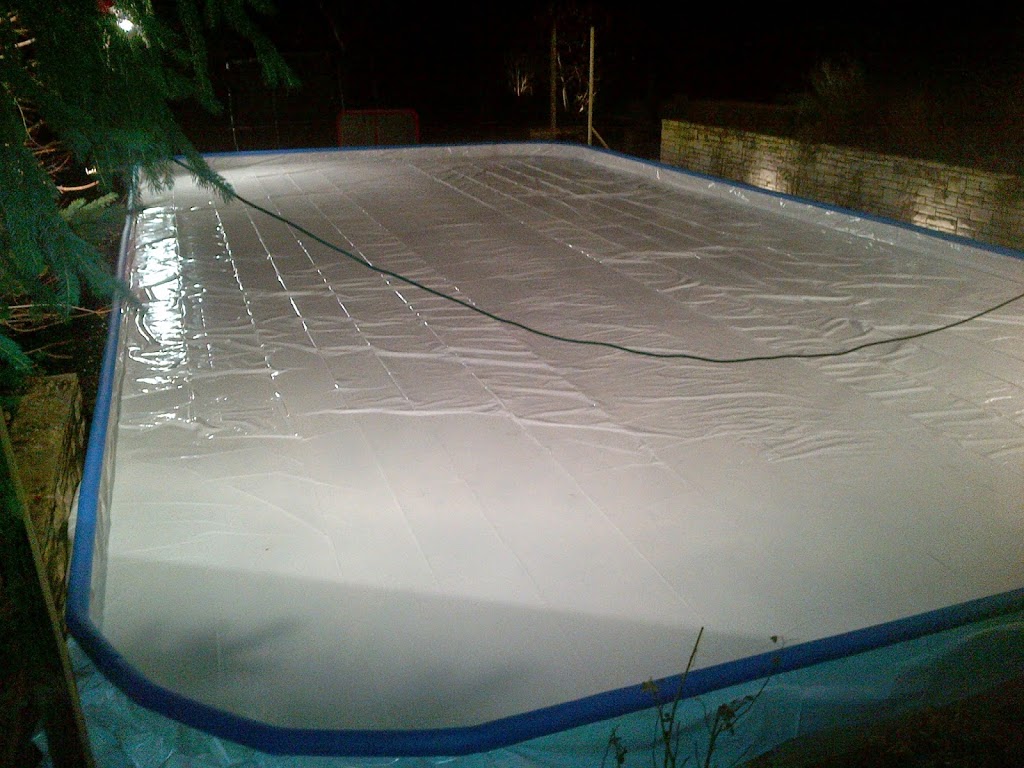
The first thing that clients notice about our liners is the uniform color of every product. There is a reason why all of our ice rink liners are white. White reflects solar energy, which upholds the integrity of the ice. Other products may come in dark colors; however, the darker the color, the easier it is to melt ice when the sun is out. Other clear liners won’t work as well either; see-through liners actually absorb heat from the grass underneath and will break down the ice more quickly.
Another way that our ice rink liners stand out from other product options stems from the materials used to create them. First and foremost, you will never get a tarp when selecting a product from Iron Sleek. We understand that there is a major difference between tarps and ice rink liners. Tarps weep, tear easily as they lack the flexible stretch properties required of an ice rink liner and compromise easily, delivering an overall sub-par experience .
 
Additionally, every liner we offer is made from 100% watertight and pinhole free polyethylene, a virgin resin plastic. At Iron Sleek, we understand that recyclable materials, although useful in many other products, are not durable enough to be used in ice rink liners. That’s why we only use virgin resin plastic. Both strong and sturdy, this resin plastic is up to freeze/thaw challenges you create in your backyard.
Beyond the materials used in the liner, Iron Sleek also uses a multi-layer design on every product we offer. Why? Single ply simply does not do the job properly in a backyard system. We offer multiple layers to ensure you are water tight, have the strength and resilience you need to keep everyone having fun in your yard.
 
Iron Sleek: Experience Our Customer Service Satisfaction For Yourself
 
Most importantly, at Iron Sleek, we stand apart from the competition due to our complete commitment to customer service satisfaction. Our team of experts will become your rink consultants as we will work with you to answer any questions about your rink, so you get the perfect set up for your system. Once you’ve selected your product, we will ship it directly to you using only top quality packing materials so your item enjoys safe transit and arrives at your home ready to perform. Ready to experience Iron Sleek for yourself? Visit our websitetoday!

The CHEAP and EASY way to add backboards to your backyard ice skating rink!


The CHEAP and EASY way to add backboards to your backyard ice skating rink!


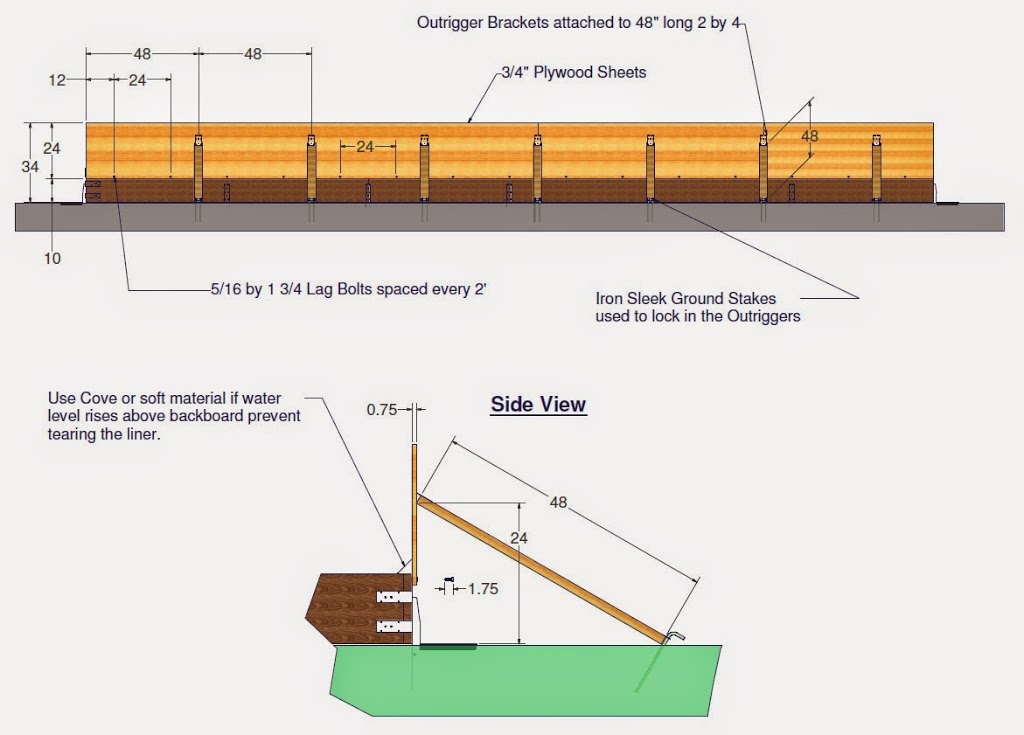
So you want to add backboards to your skating rink.  Backboards are a great upgrade that is well worth the effort but you have to build them strong to support the high leverage loads of impact.  There are many expensive and extravagant ways to do this but I am going to focus on how to do this inexpensively, with minimal labor, and minimal materials.    

First, let’s assume you have a 2’ by lumber skating rink frame.

Step 1-Build your rink frame just as you always have.  No extra money required and no extra effort. 

Step 2-Go to the local building supply store and ask for 4’ by 8’ by ¾” plywood ripped to 2’ by 8’ strips.  Buy enough plywood to cover your entire back wall.  You will now have 2’ by 8’ by ¾” plywood boards ready to add on to the skating rink for backboards.
Step 3-Take your first board and lag bolt it to the existing frame about 2” below the top of the frame (see diagrams below).
Step 4-After all of the plywood is lagged to the skating rink frame.  Utilize the Iron Sleek Outriggers, Iron Sleek Ground Stakes and a support 2 by 4 to give it the needed strength to withstand big slap shots and impact.  (See diagrams below)  If you use our Outrigger kit and Ground Stakes, Iron Sleek will provide you the lag bolts required to put up your backboard upgrades at no cost…FREE LAG BOLTS!! 


Some other notes:
For those who want full sheet backboards, use the same principals explained and diagramed in this blog but increase the size of the 2 by 4’s to 72”.


What should I use as RINK BOARDS for my Backyard Skating Rink??


What should I use as RINK BOARDS for my Backyard Skating Rink??

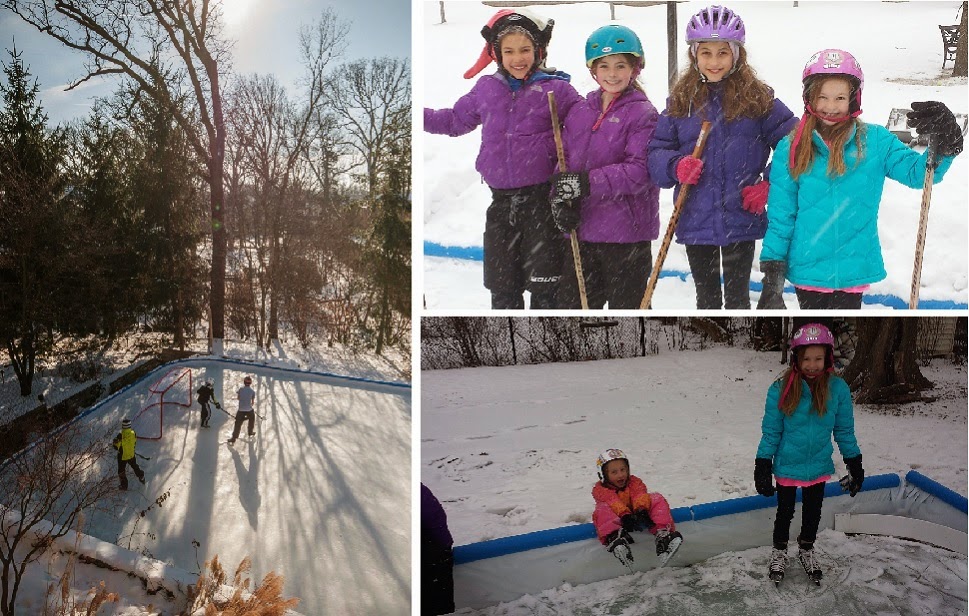
The beauty of smooth shiny ice under the clear evening moonlight and the crisp sound of skates cutting ice with the playful laughter of children and the aroma of fresh burning logs in the background air are definitely impressions that stick when we think of our backyard rinks…truly EPIC!!

backyard skating rink collage

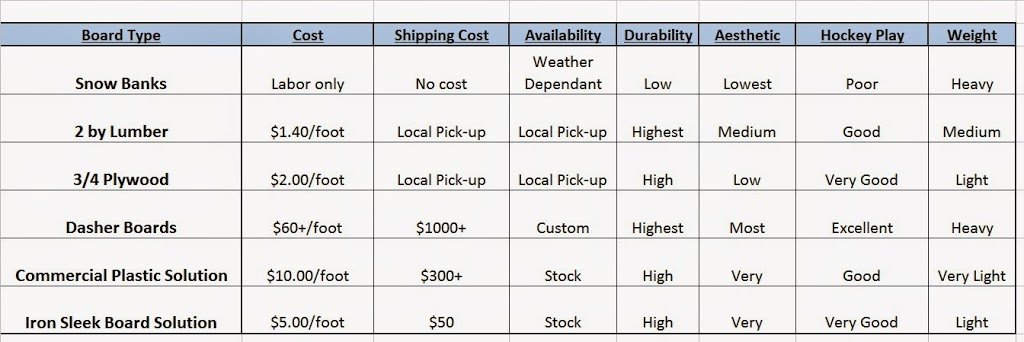
All this is possible because a containment holds water in place allowing it to transform to the expanding miraculous ice when the ambient sinks below 32 degrees.  The containment has a great function but it also adds character and personality to an outdoor rink.  There are many materials that are commonly used to contain water to form an outdoor rink.  Some options for rink boards are:  dashers boards, 2” by lumber, plywood, commercial plastic, and snow banks.  These are all good options but it is up to the rink designer to choose between cost, effort, aesthetics, and their overall vision for the rink.  The chart and dialog below is a good starting point to understand some of the differences between the various options.

Let’s start with the most deluxe…Dasher Boards. 

Real hockey dashers are rigid metal frames, 48” tall, with ½” poly permanently attached to the frames that can sustain rough hockey play.  Dasher boards are usually permanently mounted, heavy, and require construction professionals for installation.  They are usually well decorated with a base trim and a colored top ledge.  There are companies in Canada and the US who have mastered this mainly commercial market.  Heavy duty, metal framed dashers with ½” poly boards cost over $100.00 per linear foot.  There are custom wood frame options starting at $60 per linear foot or aluminum frame options that start at $30 per linear foot.  Iron Sleek does not provide dashers but we would be happy to discuss other cost effective board solutions for you that could make your rink board look and play like dashers. 
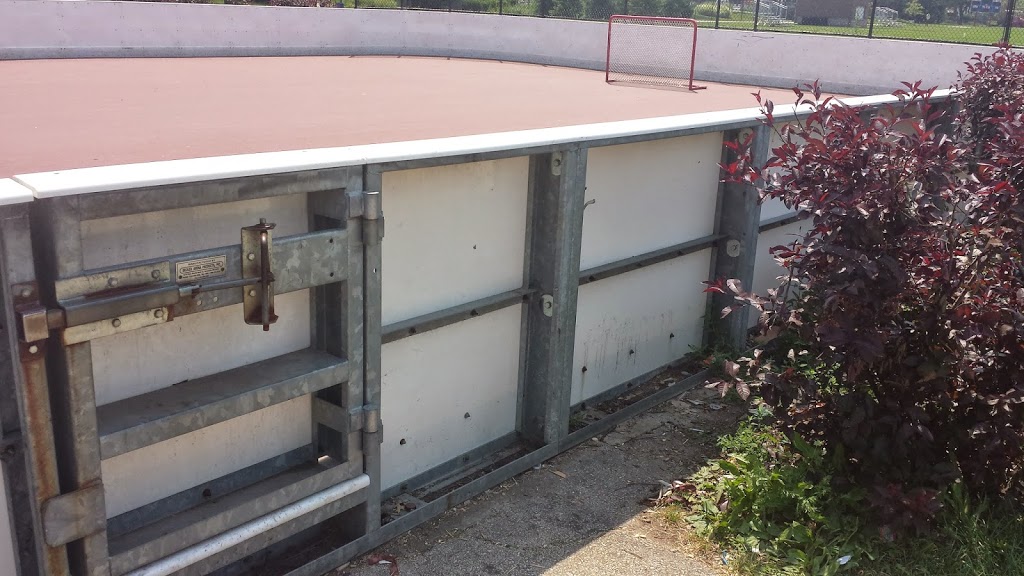
 

Steel Framed dashers with 1/2″ Poly


“2 by” lumber

“2 by” lumber is a great choice for building a skating rink.  2 by 12’s or 2 by 10’s are readily available in both Canada and the USA.  In Canada, 2 by 10’s are best the value.  Contrarily, in the US, 2 by 12’s are more favorably priced.  There are many benefits for using 2 by 12 lumber for rink boards.  2 by 12’s come in a wide range of lengths so our customers can build a rink without a single cut.  Also, 2 by lumber comes in very long lengths.  Our local lumberyard even has 20 footers.  With 20 foot boards, Iron Sleek’s 20 by 20 rink kit could be built with just 4 boards…No Seams!  Just as an FYI, most of our customers who use 2 by 12’s buy them in 10 foot length as they fit just perfectly in a minivan.  Some other benefits are that 2 by lumber is durable, easily stacked to build a 2nd story with the Iron Sleek extension bracket, and is the most cost effective solution for building a basic rink enclosure.  2 by lumber is also a tough construction material as it is strong enough so fewer Iron Sleek brackets could be spanned across the boards.  Another benefit of “2 by” lumber is that it is milled with a radius edge which helps prevent liner cuts where plywood has a sharper splintery edges.  Some short comings on using lumber for an outdoor rink is that that lumber is heavy and sometimes boards can warp if not stored properly.  Iron Sleek base cove works out great for to fill the gaps on warped boards.  Some other challenges with 2 by lumber is that the boards are heavy, they can split along the grains, and they can warp with time.  All in all, for about $1.25-1.50 per foot investment, 2 by lumber is a great inexpensive solution for building a skating rink.  Some tips on using lumber:

·       Try telling your lumberyard that you are building a backyard rink and that you would be willing to take boards with knots for a discount.  You may be pleasantly surprised.  When I built my first rink, I got 50% off for taking “inferior boards.”  The store clerk will be impressed that you are doing something so awesome and a few knots in a board will not affect the quality of your rink.  I still use those same boards today that I bought a decade ago.


·       Be careful to not miscalculate lumber sizes.  “2 by” lumber is just a nominal size.  The actual thickness of the lumber is only 1 ½”.  The same is true for the height.  For example, a 2” by 12” is acutally  1 ½” by 11”.    
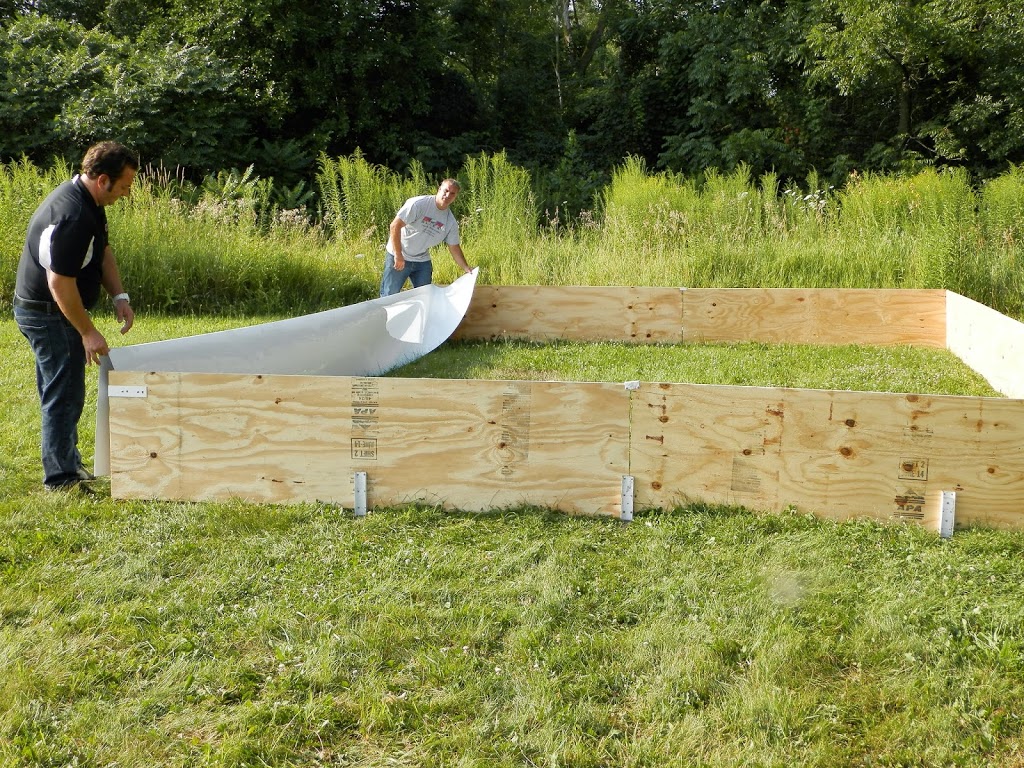
 

·       Treated lumber is not necessary unless you plan on leaving your rink set up out in the elements year round.  Treated lumber costs more and is much heavier.  Since the liner will protect the boards during the rink season, treated lumber is not required.


·       “2 by” lumber is a great choice for building a free skating rink on a low pitched site.  The rink will go up easily and it is easier to maintain as snow could simply be pushed off the sides. 


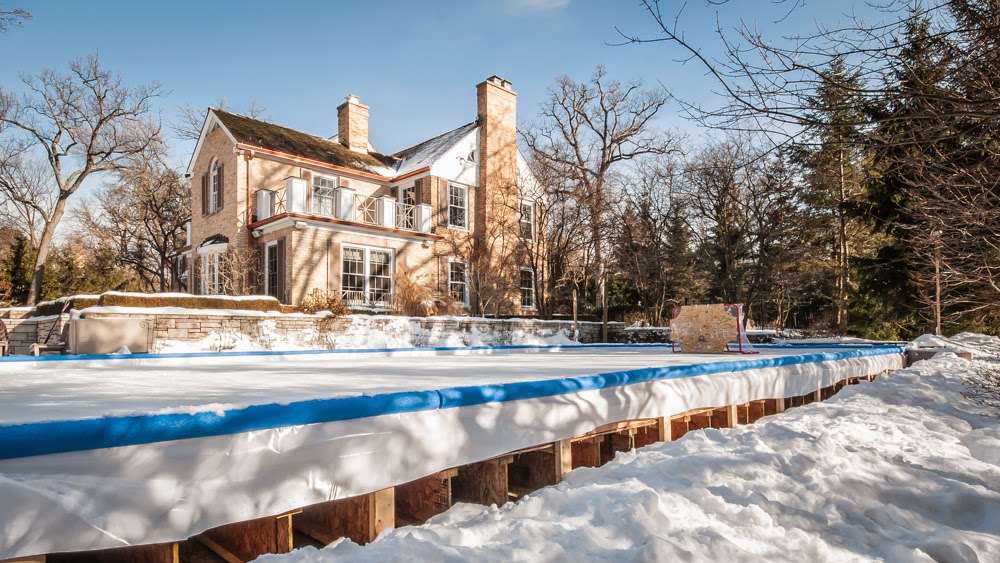
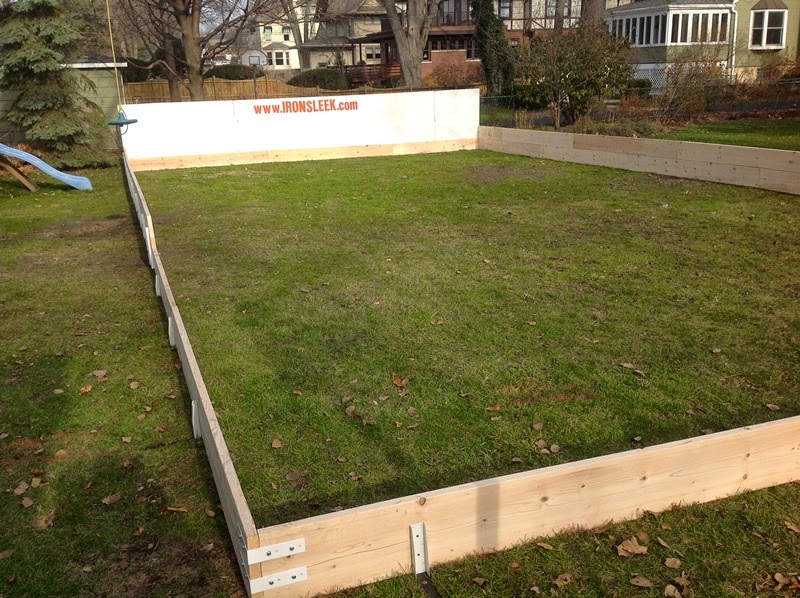
Check out just how nice a 2″ by 12 rink frame can look below:


¾” Plywood for Rink Boards
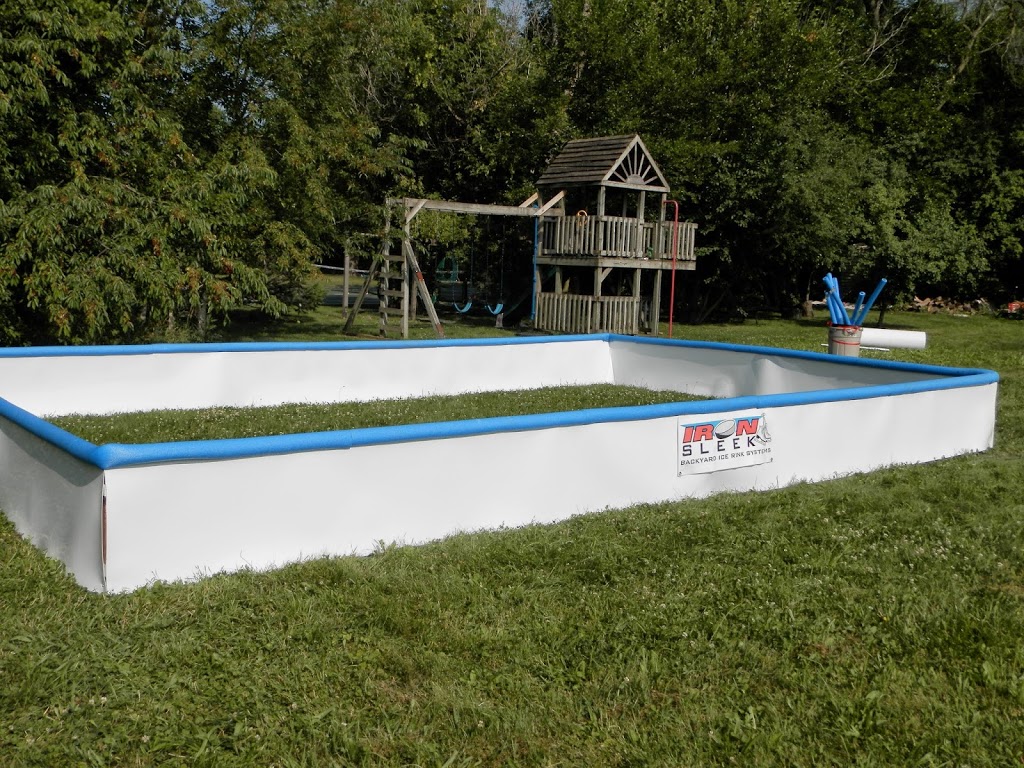
¾ plywood is also widely used as rink boards.  Did you know that in the old days plywood was used to build above ground pools?  Plywood is tough, durable, and readily available.  Plywood could be picked up almost at home improvement store.  Iron Sleek board wrap could help transform a plywood rink to a dasher aesthetic rink.  See below:
STEP 2
STEP 1


STEP 3–PLYWOOD TRANSFORMED
Plywood has several benefits for building a backyard rink.  Some of these are listed below:
 ·       Plywood boards can be ripped to accommodate water levels where 2 by lumber must be stacked. 
·       Plywood can be framed and painted to look and feel like real dashers. 
·       Plywood boards store easier since they are actually half the thickness of 2 by lumber.
·       Plywood is better for building a hockey rink.
·       Plywood is the choice of simplicity for commercial installers as they can stack and transport more boards to the job site.
Materials store can cut the lumber

Some of the challenges with plywood are:
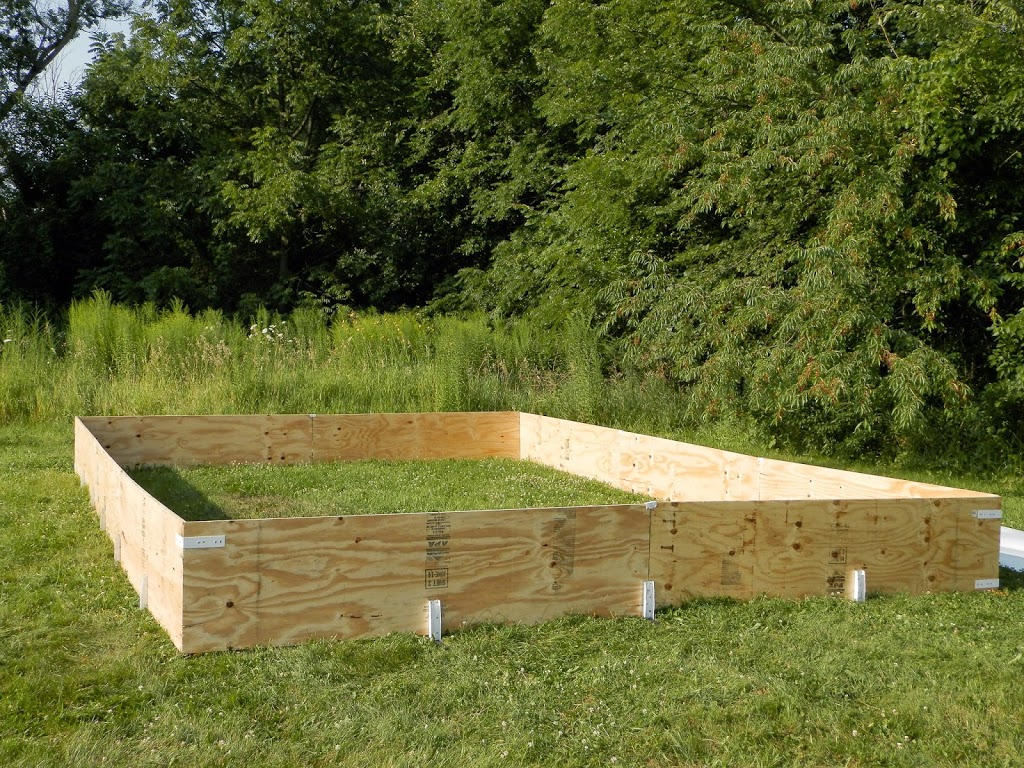
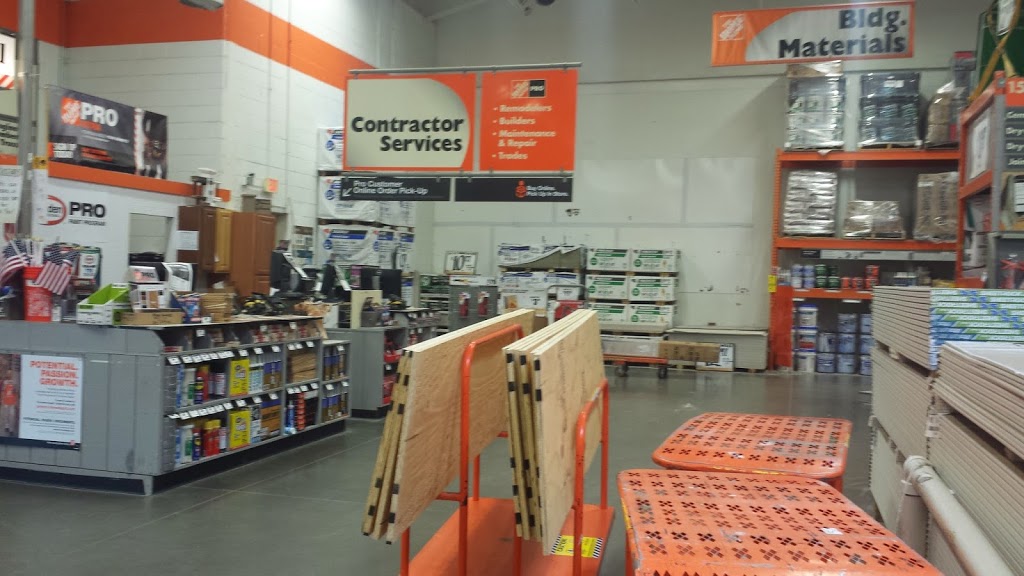
·       Plywood sheets must be ripped.  I recommend asking your lumber provider to rip the plywood or you will be stuck with a time consuming tedious job of sawing.  Sometime lumber yards rip plywood at no cost.  In Chicago, Home Depot will rip up to 10 boards at no cost. 

·       You will need base cove to protect the liner because the edges are sharp and could cut the liner from below.  Cove is critical with plywood especially when water levels exceed 11 inches. 


·       Plywood flexes so the board will not appear straight even though they are installed straight.  The water pressure and ice expansion will show board flex throughout your rink season. 


·       Screws do not bite in as well in plywood as they do with 2 by lumber.  You must be especially careful to not strip out your screws when using a power drill. 


·    Plywood does not last as long as lumber if not stored or protected properly outdoors.


Snow banks as a rink boarder

I built my first rink 20 years ago with snow banks.  20 years ago, I quickly learned that snow banks are not a reliable way to contain an ice rink using the liner method.  The main reason is that the snow will melt on a mild day and your rink will soon wash away.  Also, when you are filling your rink, the snow bank will start to melt from the warmer water.  Yes, snow is free, but if you are serious about having a backyard family rink, choose a construction material as a rink board.  Snow banks are exhausting to maintain; however, they are still commonly used on ponds as it is difficult to bring construction materials to the edge of a lake.  Iron Sleek has simplified building a rink on a pond and has provide an alternative to snow banks with the Iron Sleek Pond Bracket.   See video below:

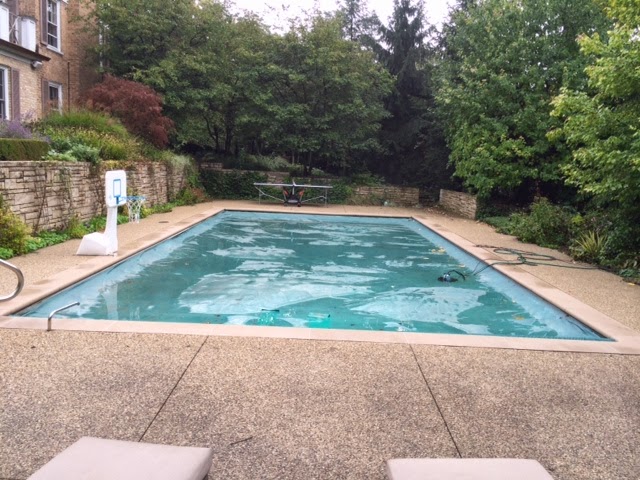
Can I build a rink over my in-ground pool?


Can I build a rink over my in-ground pool?


It would be amazing to transform a swimming pool area into a winter skating arena.  The pool area of a home is ideal for entertaining.  Power and lighting are in place and, in some pool areas, Jacuzzi’s and fire pits are already being used during the winter months.  How cool would it be to now have a winter ice rink for hockey and skating in the very spot where you swim and sunbathe in the summer months?   A rink in the pool area is a great idea for having a family fun time during the winter but there are several things to consider before you commit to this possibility.


Can it be done?

The most favorable scenario for building a rink above the pool is when the in-ground pool is surrounded by healthy concrete.  Most in-ground pools have a nice patio surrounding so they are well suited for this project.  If your pool is surrounded by pavers, it likely can also be done but extra care will be required to spread the base load. 


 How is it done?


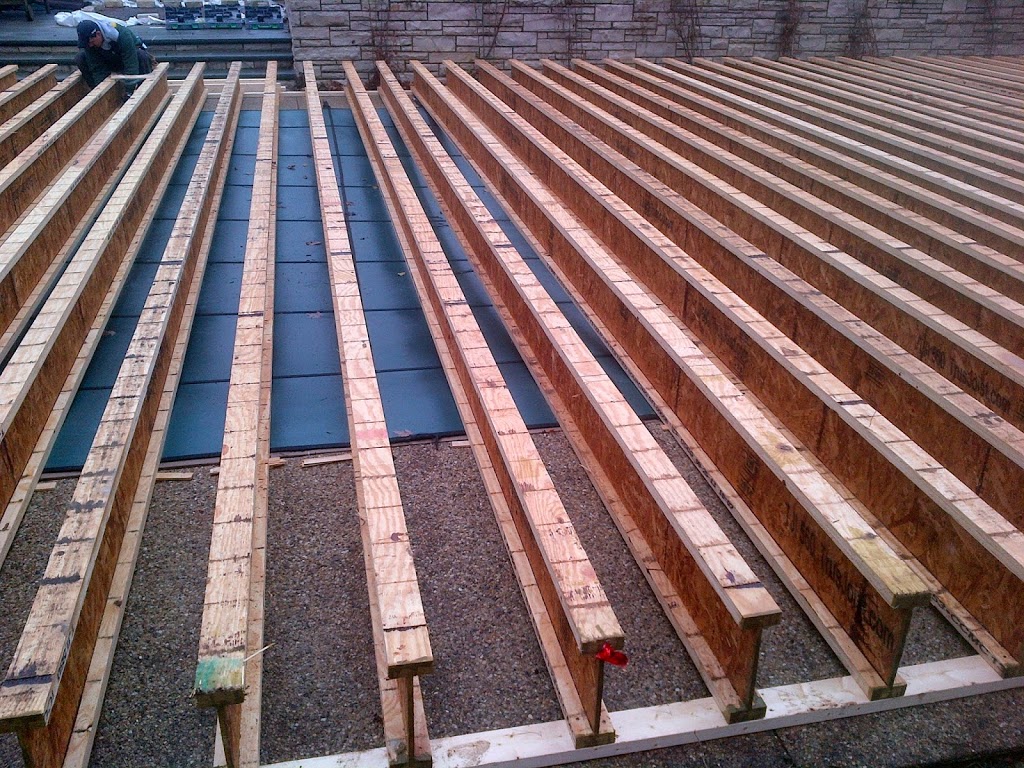
In essence, what you will be doing is building a shallow pool above a pool (rink over in-ground pool).  The in-ground pool should be covered and closed just as it would be for a regular end of season winter.  A stage with trusses spanning the entire width of the pool should rest on the patio and be slightly raised above the pool.  Raising the stage is critical as it spreads out the base load and helps to level the platform if needed.  THIS METHOD LEAVES YOUR POOL UNTOUCHED.  The platform should be level within 2 inches to keep the water load at a minimum.  Then, side walls are put up around the stage to form a rink enclosure.  Finally, a one piece ice rink liner will cover the entire enclosure.  Now with the rink filled, patiently wait for the freeze.  All the same rules to building a backyard rink apply once the stage and enclosure are built.  If you want to make the rink gorgeous, consider using rink topper, rink rounds, and board wrap.


Rink enclosure above pool ready for fill up!


The Stage/Platform


The stage should be engineered by an architect or engineer.  Do not just wing this and do not do it yourself!  It would be a DIY undertaking nightmare.  The architect should design a deck that could support the load of the lumber, ice, and multiple skaters while being solid enough to minimize ice cracks.  The balance here is to keep stage profile low while keeping engineering specs and material cost in check.  If the stage is not solid, the bouncing will encourage the ice to shatter.  The dynamic and static load should be several times better than that of you own home.  Do not use basic 2 by lumber for truss as they are not stiff enough, use engineered trusses.  The truss manufacturers should be able to help your contractor determine the truss size and spacing for the application.  For the stage platform floor, it is recommended to use ¾ plywood with a tongue and groove.  Be sure that the stage base is well distributed along the concrete patio.  Also, be sure the stage is built in a way that makes it easy to disassembly.  When the stage is torn down for the season, dispose or recycle the liner and store the stage material indoors.


Engineered stage


The Cost and the Effort


This is just a guideline from our experience in building rinks above pools in Chicagoland.  Building materials are $5.00 per square foot.  Labor comes out to $2.50 per square foot.  So for a 25 by 50 rink the cost would be $6,250.00 in materials and $3,120 in labor.  The labor effort is 4 skilled carpenters for nearly 2 days to assemble and just 1 day to disassemble.  Storage would cost about $1000/yr.  It seems like a lot of money up front but it is just a fractional investment compared to the pool while it repurposes your awesome pool area for the winter.  The material investment is mainly a one-time investment and the reoccurring cost of set up should be less the 2ndyear than it was the first year because all of the wood cuts and field decisions will have been already completed.  A rink above a pool is a great investment in family fun that transforms your pool area to a winter wonderland.
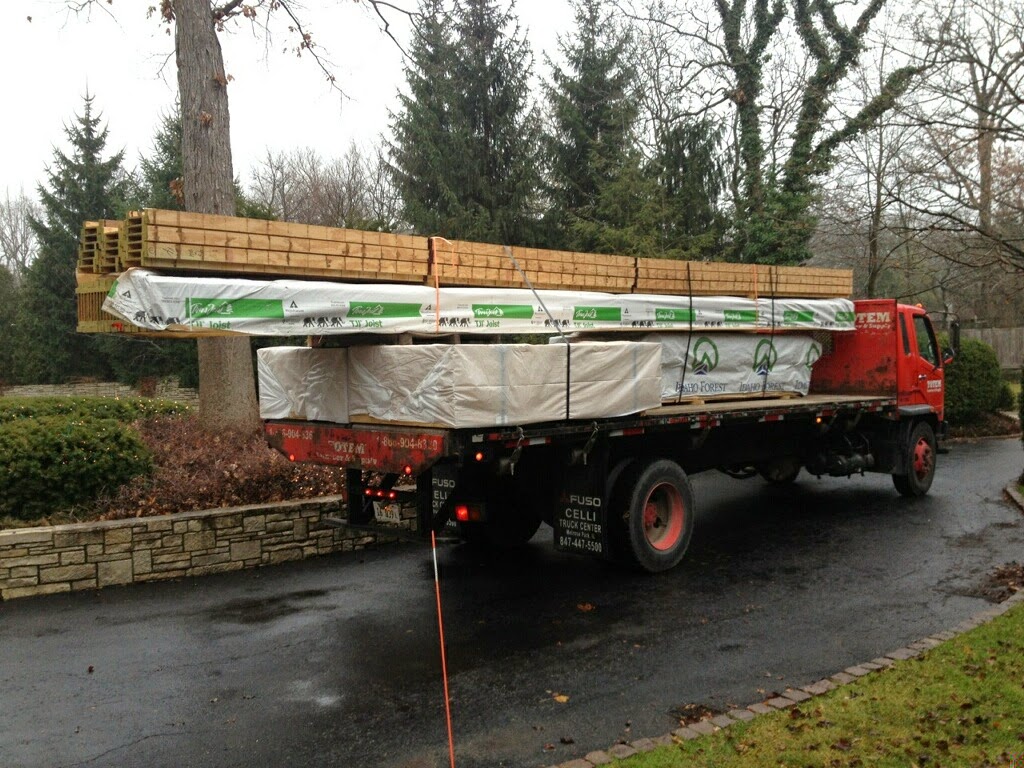
Material delivered


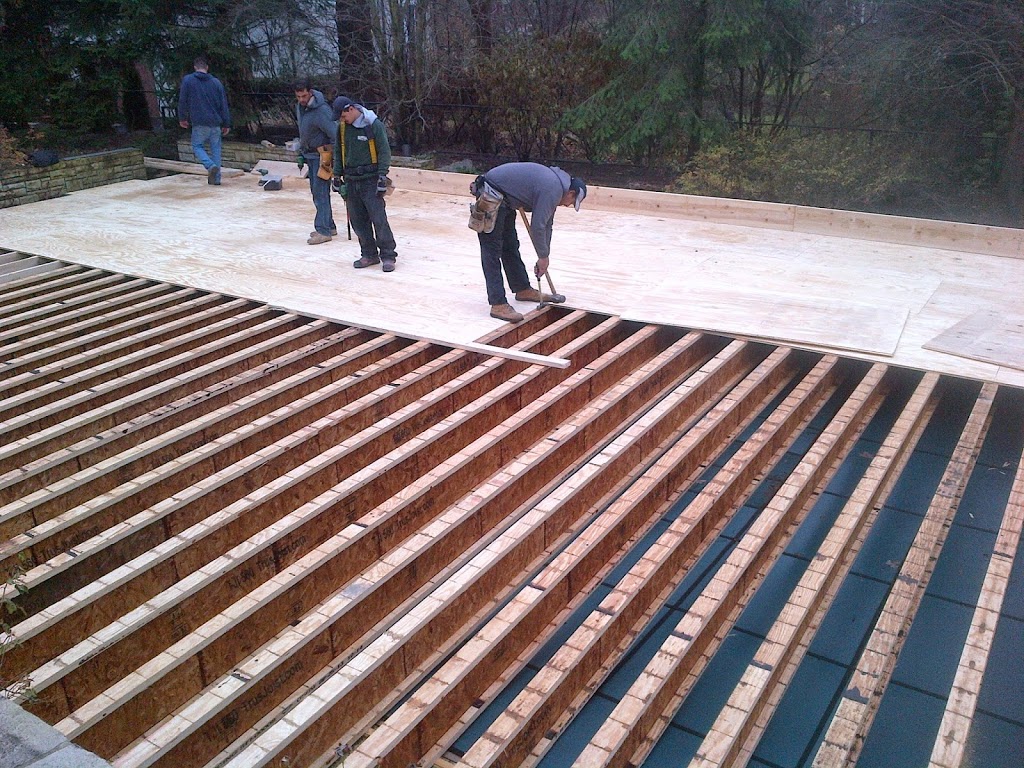
The labor effort


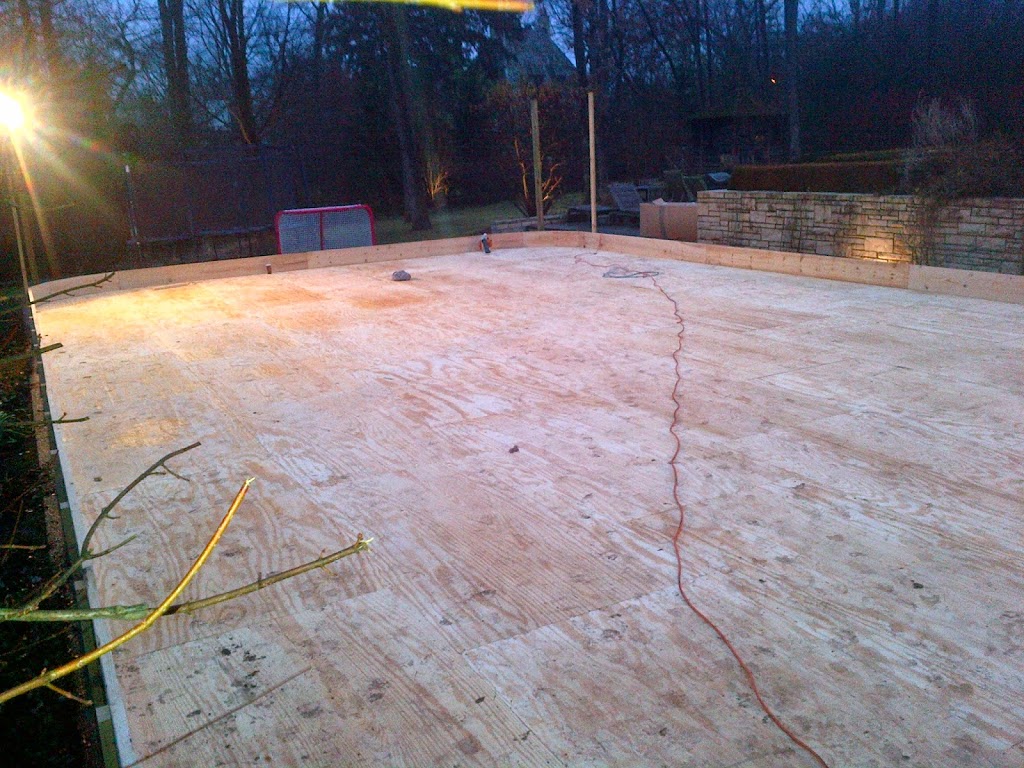
Stage is built, ready to become a rink!!


Ice quality


You will have better ice because the rink is above the pool as opposed to being on the warm pitched earth surface.  Here is how this works.  The pool cover will act as a vapor barrier and will keep the warmer water from underneath from heating the ice rink.  The rink will actually freeze from both the top surface and the bottom because the ambient cold air will attack the rink water from both above the rink and below it.  On a basic rink built on lawn, the earth actually warms the water.  Freezing water on a rink built on lawn is a tug of war between the earth’s warm ground surface trying to heat the water and the cold ambient air working to freeze it.  With a rink above a pool, this tug of war of freezing does not exist.  We have all seen the street signage “Watch for Ice under Bridge”.  That same concept applies…it is colder under the rink because it is shaded.  Another consideration for better ice is that the platform will be level.  A rink built on grass has to negotiate several inches of ground pitch.  The ground pitch causes temperature gradients in the ice that cause cracking.  With the rink above the pool, temperature gradients will be minimal and it will also be likely that the rink water will freeze 100% throughout.  Seldom does a typical backyard rink freeze 100% across.  Conclusion, ice quality is better on a rink above a pool.     


Transformed!!


Pristine ice above the Pool!!
Who does this?


-A rink above a pool is a luxurious expensive solution for an ice rink.  This is an option for families that can afford the more elaborate solution.
-This is a solution for families whose yards space is taken up by the pool.

-If your yard is severely sloped and the only flat area you have is the pool area, you may want to price this out. 

-A good solution for those who do not want to disturb their landscaping. 


Opportunities

-A rink on a stage is usually level enough to convert to a refrigerated rink.  If you want to extend your skating season from Thanksgiving to St. Patrick’s day, consider installing refrigeration. Refrigeration for a 30 by 50 rink starts at 50k plus extras. 


-The stage can be used as a sports court so you can enjoy it for roller hockey, basketball, paddle, or pickleball before the winter season hits and it gets converted to a backyard hockey rink.    

-The stage is not a complete sunk cost.  It should have resale value to a local ice rink installer.  Refrigerated rink are often build on platforms.